Make this easy DIY Headband Holder and get all of your hair accessories in order. You probably already have what you need at home to make this.

Are you struggling to keep all of those adorable headbands in order? Learn how to make this cute DIY Headband Holder out of an old oatmeal container. You can get organized with very little effort
Plus, doesn’t this look so adorable? You can make it to match your child’s decor, and it will look so cute on their dresser. We had a blast making this. You might also want to make DIY Scrunchie No sew and learn How to make a Bow Scrunchie.
Table of contents
Why We Love This
It’s an easy and inexpensive solution to store headbands for little girls. Headband storage can be a challenge if you have a lot of headbands. We used an empty oatmeal container and transformed it into the perfect headband holder.
Not only will it help get all of the headbands in order, but it is budget friendly! No need to order expensive containers to organize your headband collection. This easy tutorial makes it simple.
You won’t have a mess in your drawer or counter with headbands and hair bows for kids. Get rid of chaos with this DIY Headband Organizer.
Supplies

- 1 large oatmeal container, empty and the label removed. The cylinder is the perfect shape.
- adhesive fabric tape
- 5/8″ ribbon
- E6000 glue
- Scissors
- Pipe Cleaners
- Decorative Butterflies
- Hot Glue and Hot Glue Gun
- Pencil
- Colored Card Stock
- Rubbing Alcohol
- Cotton ball
- Ruler
- glass candle stick
Step By Step Instructions

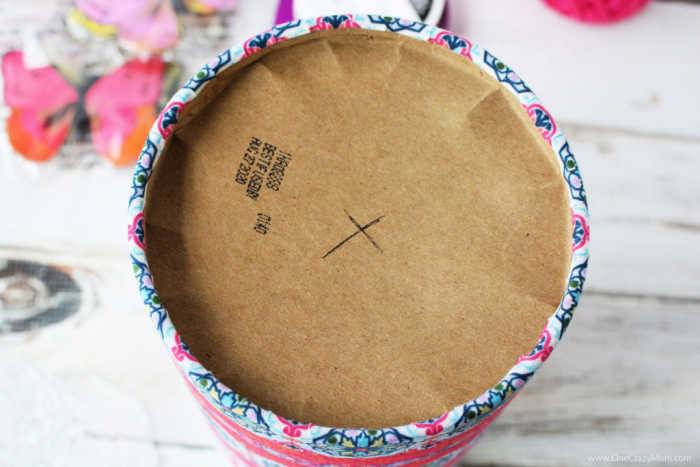
Step 1. First, remove the lid from the container and set aside. Use ruler and pencil to mark the center of the container on the bottom.

Step 2. Next, cut a piece of fabric tape.

Step 3. Then wrap the oatmeal container in it.

Step 4. However, if any fabric tape hangs on the bottom of the container, simply cut slits about 1/2″ apart and fold the fabric tape under the container.

Step 5. Place the lid on a piece of card stock and trace it onto the paper. Cut out, just inside the line so the paper fits on top of the lid.

Step 6. Attach the paper to the lid with a line of hot glue. Once you are finished hot gluing, place the lid on the container.

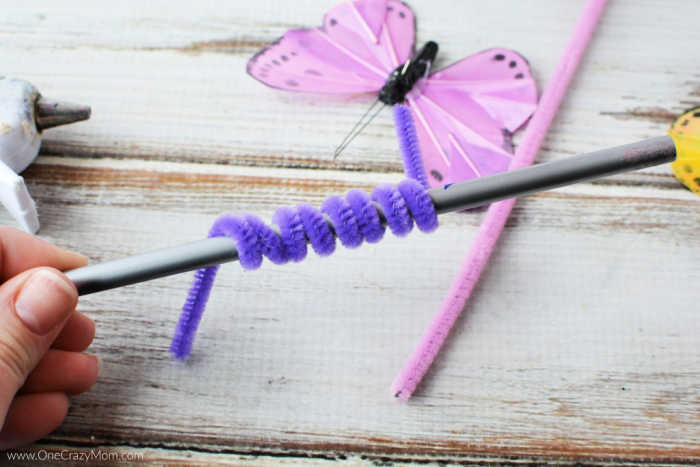
Step 7. Wrap pipe cleaners around a pencil to create a spring.

Step 8. Use hot glue to affix one end of the “spring” onto the butterfly.

Step 9. Repeat until there are three butterflies on three separate pipe cleaner springs.

Step 10. Attach the opposite end of the spring to the rim of the lid with hot glue. (Note: attach the “springs” onto the back of the container where the seam of the fabric tape is.) Wrap the rim of the container, covering the lid edge, with ribbon and tie into a bow. If necessary, secure with hot glue.

Step 11. Finally, wipe the top of the candlestick with a cotton ball coated in rubbing alcohol to remove oils and clean it. Let dry. Spread E6000 glue onto the top of the glass candle stick. Gently press the line of glue into the center of the container using the center mark as a guide. Allow to set overnight.

Step 12. When completely dry, add your favorite headbands to store them using this easy headband holder.

How to Store Headbands
Simply place the headband and elastic headbands around the container. It will stay securely, and you can stack the headbands on top of each other. It makes it easy to stay organized.
You can also use this to place hair clips on it and keep organized.
Expert Tips
- Hot glue. Make sure you have a good glue gun and lots of glue sticks for this craft.
- Clean the candlestick. The top of the candlestick should be cleaned thoroughly prior to adding the glue and container. Rubbing alchohol will remove any oils so the glue can adhere properly.
- Allow to set overnight. Once the glue and candlestick have been applied, it is best to allow this to dry and set overnight. It will ensure it is sturdy and well secured.
Variations
- Containers. We used an oatmeal container for the perfect size. You can try other containers such as grits containers or a paper towel roll. This might be perfect for baby headbands that are smaller.
- Fabric Tape. Coordinate the colors of your baby girl’s bedroom and use the fabric tape in the color of your choice.
- Ribbon. You can use any color that matches your decor.
- Embellishments. The butterflies are darling but other cute ideas include flowers, bees, buttons and more. You can decoupage to cover the container.
- Clips. Attach clips to turn this into a bow holder or for hair ties.
- Wrapping paper. Try using wrapping paper around the container. You can match this to the decor in your child’s bedroom or nursery.
- Vinyl Strips. You can wrap in vinyl strips for another fun way to decorate the oatmeal container.
More Easy DIY Crafts
You will love being able to organize headbands with this easy project. Try making it today and leave a comment.
DIY Headband Holder
Equipment
- 1 large oatmeal container, empty and the label removed
- adhesive fabric tape
- 5/8″ ribbon
- E6000 glue
- Scissors
- Pipe Cleaners
- Decorative Butterflies
- hot glue and hot glue gun
- Pencil
- Colored Card Stock
- Rubbing Alcohol
- Cotton ball
- ruler
- glass candle stick
Instructions
- Step 1. Remove the lid from the container and set aside. Use ruler and pencil to mark the center of the container on the bottom.
- Step 2. Cut a piece of fabric tape and wrap the oatmeal container in it. If any fabric tape hangs on the bottom of the container, simply cut slits about 1/2″ apart and tuck the fabric tape under the container.
- Step 3. Place the lid on a piece of card stock and trace it onto the paper. Cut out, just inside the line so the paper fits on top of the lid.
- Step 4. Attach the paper to the lid with hot glue. Once you are finished hot gluing, place the lid on the container.
- Step 5. Wrap pipe cleaners around a pencil to create a spring. Use hot glue to affix one end of the “spring” onto the butterfly.
- Step 6. Repeat until there are three butterflies on three separate pipe cleaner springs.
- Step 7. Attach the opposite end of the spring to the rim of the lid with hot glue. (Note: attach the “springs” onto the back of the container where the seam of the fabric tape is.)
- Step 8. Wrap the rim of the container, covering the lid edge, with ribbon and tie into a bow. If necessary secure with hot glue.
- Step 9. Wipe the top of the candlestick with a cotton ball coated in rubbing alcohol to remove oils and clean it. Let dry.
- Step 10. Spread E6000 glue onto the top of the glass candle stick and gently press into the center of the container using the center mark as a guide. Set overnight to set up.
- Step 11. When completely dry, add your favorite headbands to store them.


