Learn how to make a Fleece Tie Blanket for the perfect afternoon DIY activity. This no sew project is so easy to make and perfect for gift giving and more.

If you have wondered how to make a fleece tie blanket, we are going to show you just how easy it is. This is such an easy DIY project and doesn’t take much time or expense.
We love these blankets, and they are so cozy. We also made a DIY Blanket Ladder, and it is perfect for storing these blankets on.
Why We Love This DIY
I received a fleece no sew blanket as a baby shower gift many years ago and still use it today. They hold up great, look so cute and provide the perfect amount of warmth.
The ideas are endless for these blankets and you can do them in team colors, characters, your favorite color and much more. Once you make one of the blankets, you will be hooked.
Get started today. They are so fun and make a great gift. If you want to make something for your pup, try one of these DIY Dog Toys.
I also love to make Tin Can Crafts.
Materials
- Fleece fabric. You can choose any color or pattern you like.
- Scissors. Make sure to have good fabric scissors that are sharp.
- Ruler or Tape Measure. Either of these will work fine to measure the fabric.
Get all of the supplies needed at the bottom of the page.
Step By Step Instructions

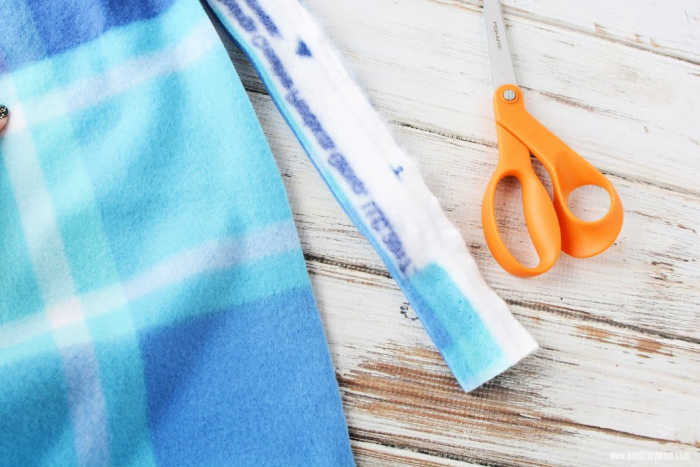
Step 1. First, lay both sides of the fleece pieces on top of each other. Cut off the selvage edge. That’s the edge that isn’t cut on the bottom piece.
Step 2. Even out each piece of fabric, cutting together in a straight line so they are the same size. Make sure to not use the wrong side. You can use a cutting mat if you have one.

Step 3. Keeping both sides of the blanket together as sides face, measure a 7″ square in each corner and cut out. Using a tape measure such as square ruler, acrylic ruler or yardstick and lay it across the edge of the fabric.
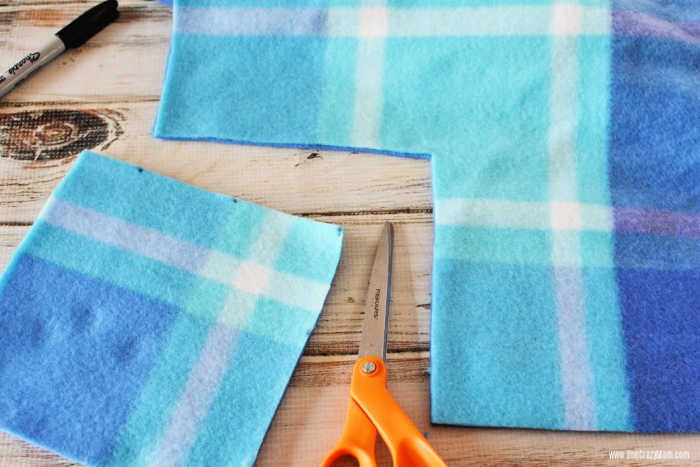
Step 4. Cut the strips, 1″ wide and 7″ long in the corner of the blanket.
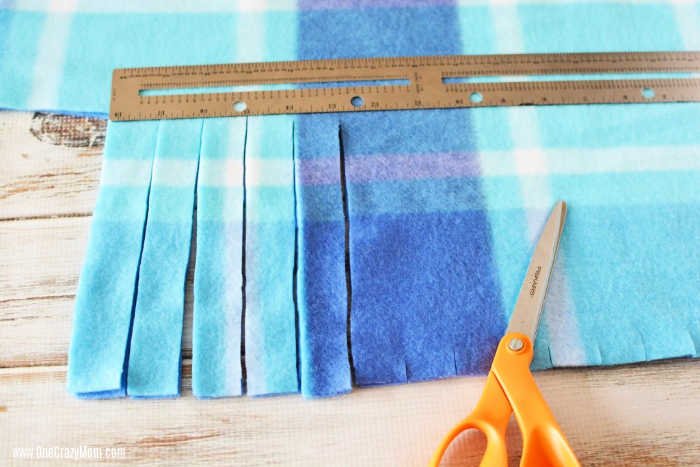
Step 5. Make sure to cut both pieces of the entire edge of the fleece blanket fabric at the same time into fringe cuts.

Step 6. Begin to knot the pieces of fabric on each slit. It is similar to a necktie.
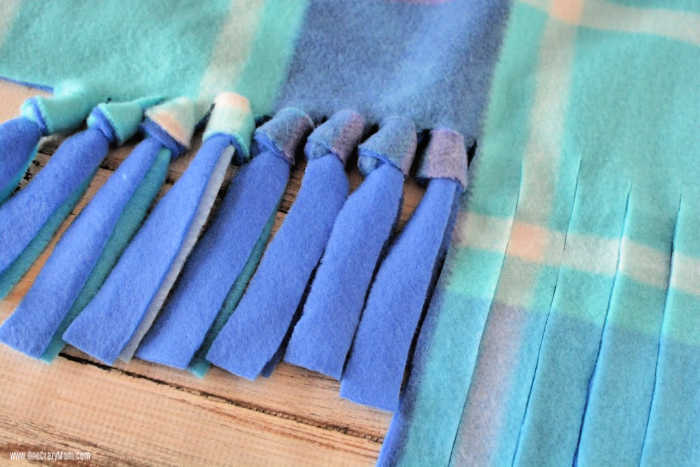
Step 7. Any method of knotting is fine to fleece tie but double knotting is what I do with a square knot.
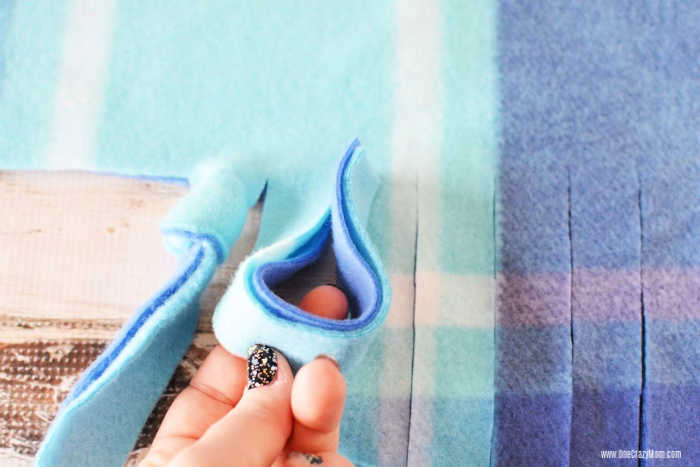
Step 8. Just make sure you do the exact same knot in the blanket material so they are uniform. I like to fold the tassels up and around to form a knot.

Step 9. If necessary, trim the ends of the tassels.
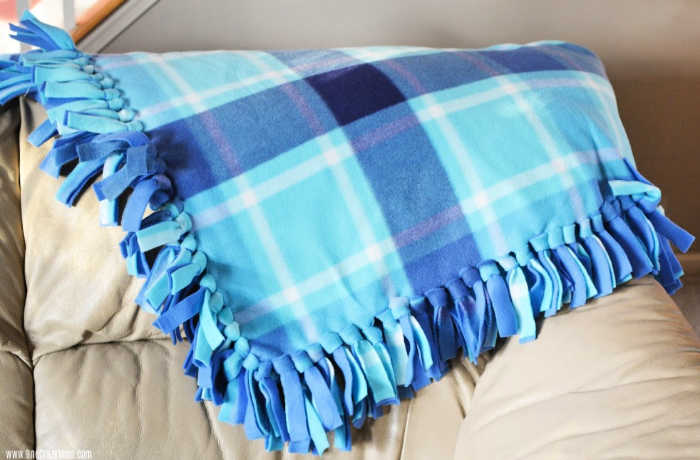
Step 10. The blanket is now ready to enjoy.
Frequently Asked Questions
Most fleece fabric is around 58″ inches wide and this is a good size. We used 2 yards but you can use 1.5 yards for a smaller blanket.
These also make a really cute baby blanket in a smaller child’s size blanket. Just follow the step by step instructions.
You can make one of these blankets in about 30 minutes. It does not take long at all!
Regular washing has not hindered the blanket, and everything has stayed very secure and the fabric still looks great. This is perfect for kids as you may have to launder their blanket a lot. You will love the durability of the blanket.
Once you get started cutting, it is very simple to do. Just make sure to cut both pieces at the same time.
The options are endless for fleece blankets.
Sports themed fabric- Make one in your favorite team fabric. Great gift idea for teens.
Character fabric – Mickey, Princess etc.
Favorite color
Baby blanket- make a smaller size blanket for a great baby shower gift.
Home decor- make a blanket to match your decor and it will be the perfect throw blanket.
Holidays. Make an assortment of blankets in fun holiday fabrics.
More Easy DIY Projects
Get started today making a knot blanket! Please leave a comment and let me know how your blanket turns out.
Fleece Tie Blanket
Equipment
- 2 Pieces of fleece fabric both 2 yards
- Scissors
- Ruler or Tape Measure
Instructions
- First, lay both of your fleece pieces on top of each other. Cut off the selvage edge.
- That’s the edge that isn’t cut. Even out each piece of fabric, cutting together so they are the same size.
- Keeping both pieces of fabric together, measure a 7″ square in each corner and cut out. Using a tape measure, lay it across the edge of the fabric.
- Cut the strips, 1″ wide and 7″ long, making sure to cut both pieces of fabric at the same time.
- Begin to knot the pieces of fabric. Any method of knotting is fine to fleece tie but double knotting is what I do.
- Just make sure you do the exact same knot so they are uniform. I like to fold the tassels up and around to form a knot.
- If necessary, trim the ends of the tassels. Enjoy!



Want to make Lap Blankets for people in wheel chairs, not sure what is a good size, thanks
Thank is so sweet! I would make them at least 35″ by 40″ for a lap blanket.
Thanks, now I can go to work and make them
I have made many of these over the years and these blankets never disappoint. I used to always one patterned side and one solid side in a color that coordinates with a color from the pattern. But sometimes I will a pattern on both sides and I call it a “reversible” blanket for fun. For example, I made a friend who loves Nascar a blanket using his favorite driver #3 licensed fleece on one side and I used a black and white check fleece to back it because it looked like the checkered flag they use at the finish line. It was so cute. Here are some other “reversible” blankets I have made over the years:
– licensed Frozen Elsa and Ana backed with light blue and white snowflake pattern.
– Licensed red and white Minnie Mouse backed with a large red and white polka dot pattern. ADORABLE! You can the same concept with the licensed pink and purple Minnie Mouse.
The opportunities are endless!
Love it! Great ideas – thanks for sharing!
Muchas gracias, se me ocurrió hacerle una a mi sobrino, que por ahora está muy triste. Con sus personajes favoritos.
You’re weclome!
I like this, blanket because it is blue.