This DIY Floating Pool Cooler is so fun, and you can make it for less than $5! Beat the heat and make this pool beverage cooler to enjoy for your next pool party.

We have the best DIY project for you that will be a blast this Summer. Make this DIY Floating Pool Cooler and have a cool beverage nearby while you enjoy the pool.
No need to get out when you can just grab a drink from this floating cooler. It will keep ice and beverages handy for when you need to quench that thirst poolside.
While you’re in the pool, try some of these Swimming Pool Games.
Why We Love This
We had a blast making ours and it was so easy! We filled it up with juice boxes the other day and the kids thought it was awesome.
For just a few dollars, this cooler can be ready to enjoy in no time at all. Plus, you will save so much time having this cooler handy.
The process is simple, and you can put this together in hardly any time at all.
Whenever the kids get thirsty, just grab the floating cooler and your snacks. No one ever has to leave the pool. This is the best DIY for hot summer days.
Supplies

Step By Step Instructions
- Step 1. Measure the rope around the plastic bin and cut the appropriate length. You’ll need enough to go around the entire plastic bin and to make a loop on one end so that the bin can be pulled around the pool easily.

Step 2. Cut a pool noodle so that it can go around the entire plastic bin. You can use a serrated knife to easily do this.

Step 3. You will need 4 individual noodles for the sides of the cooler.

Step 4. String the rope through the pool noodles.

Step 5. Line them up under the lip of the bin.

Step 6. Once the rope has gone through all the noodles, pull tightly.

Step 7. Tie a knot to secure the noodles under the lip of the plastic bin.

Step 8. Tie another knot at the very end of the rope to create a loop at the end of the bin. This is so that the pool cooler can be easily pulled around the pool.

Step 9. Now, the pool is ready to fill with drinks and use.
Try More Fun Ideas For Summer
- How to make Sidewalk Chalk Easily
- Easy Homemade Bubbles Solution
- 20 Easy Summer Paper Plate Crafts for Kids
- 25 Water Activities for Kids
- 40 Easy Popsicle Recipes for Summer
- 12 Water Bottle Crafts
You will love this cooler for summer in the pool. Go ahead and make it and leave a comment. It is so much fun to read your comments.
DIY Floating Cooler
Equipment
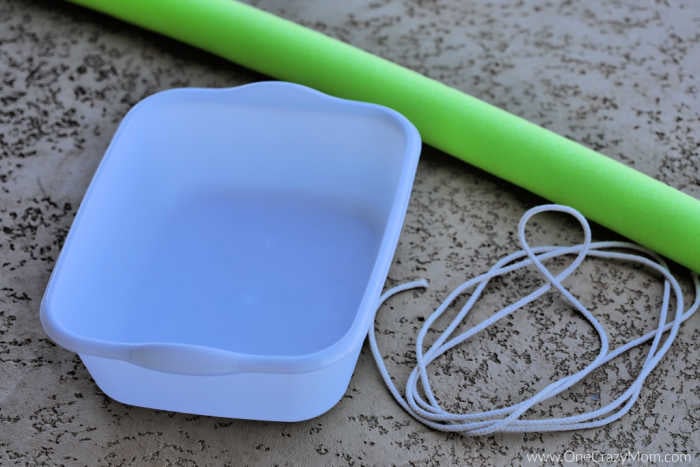
- Plastic bin with a lip around the upper edge
- Pool Noodle
- String or Rope
Instructions
- Step 1. Measure the rope around the plastic bin and cut the appropriate length. You’ll need enough to go around the entire plastic bin and to make a loop on one end so that the bin can be pulled around the pool easily.
- Step 2. Cut a pool noodle so that it can go around the entire plastic bin. You can use a serrated knife to easily do this.
- Step 3. You will need 4 individual noodles for the sides of the cooler.
- Step 4. String the rope through the pool noodles.
- Step 5. Line them up under the lip of the bin.
- Step 6. Once the rope has gone through all the noodles, pull tightly.
- Step 7. Tie a knot to secure the noodles under the lip of the plastic bin.
- Step 8. Tie another knot at the very end of the rope to create a loop at the end of the bin. This is so that the pool cooler can be easily pulled around the pool.
- Step 9. Now, the pool is ready to fill with drinks and use.


